
This article walks through the process of setting up OAuth2 authorization in Integray using Microsoft Azure login.
🔧 Creating the Azure Application
The first step is to create an application in the Microsoft Azure portal. This will generate the credentials required for OAuth2 authorization.


Required Details During App Registration:
- App Name
- Supported Account Types:
Select the first option:
Accounts in this organizational directory only (Single tenant) - Redirect URI:
Although marked as optional, this will be required later. It can be skipped for now and configured afterward.

After entering the necessary details, click Register. The newly created application will now appear in the App registrations grid.

🔑 Adding Client Credentials
To proceed with the authorization, a client secret must be created:
- Open the newly registered application.
- In the left-hand menu, go to Certificates & Secrets.
- Create a new client secret.


⚠️ Important: Client secret values can only be viewed once — immediately after creation. Make sure to save the value before leaving the page.
Only the value is needed later, not the secret ID.
In the table, you will see the name, expiration date, value, and secret ID.
🌐 Retrieving Endpoint URLs
Navigate to the Overview section of the application and open the Endpoints tab. This tab provides key URLs required for authorization setup in Integray.

Further steps for configuring the Redirect URL will be provided below.
🔄 Setting Up OAuth2 in Integray
Now switch over to Integray.
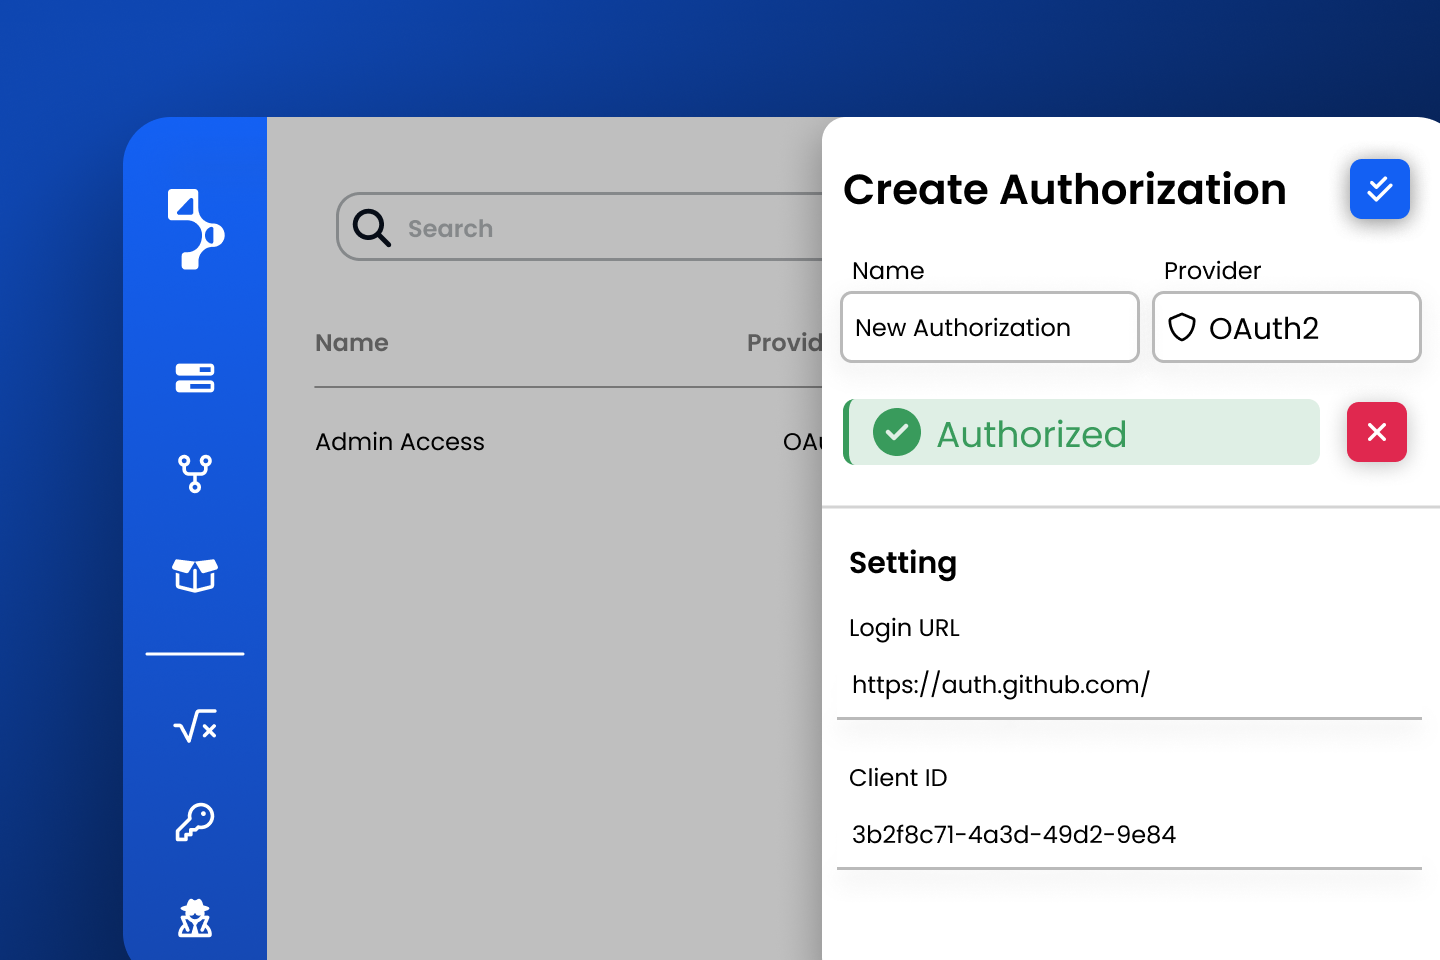
In the Authorizations section, create a new authorization:
- Click +Add
- Select OAuth2 as the provider.
Configuration Settings:
- Login URL:
Use the OAuth 2.0 authorization endpoint (v2) from Azure’s Endpoints tab. - Login Query Params:
Use the pre-filled value:response_type=code - Request offline_access scope:
Set this checkbox to True - Client ID:
Copy the value from Application (client) ID in Azure’s Overview section. - Client Secret:
Paste the value of the previously saved client secret. - Redirect URI:
This is predefined in Integray as:api/Callback/GenericOAuth2 - Access Token URL:
Use the OAuth 2.0 token endpoint (v2) from Azure’s Endpoints tab.

🔁 Configuring the Redirect URL in Microsoft Azure
Now go to the Microsoft Azure platform and configure the Redirect URL:
Steps:
- Click Configure
- Click on +Add a platform
- Select the platform: Web
- Insert the Redirect URL copied from your authorization in Integray


🧩 Configuring Connectors
Currently, it is recommended to use this authorization with the Advanced Rest API Connector.

For more details and specifications of endpoints, refer to the documentation in the Endpoints tab for the selected product.
🎯 Reviewing and Customizing Scopes
In the Scopes tab, you must define custom scopes to specify permissions according to your company’s needs. This should follow the principle of least privilege to ensure optimal security.

As seen in the Auth tab on LinkedIn for developers, Scopes are defined based on the product selected for the app.
In Integray, the same scopes must be entered — otherwise, the authorization will not function correctly.
✅ Finalizing the Authorization
Once the connectors and scopes are configured, the authorization setup is complete.
- Accept the requested permissions
- Click the Authorize button

After successful authentication, the status will change from Not authorized to Authorized

Finally, click the Save button to store the new authorization.

With OAuth2 successfully configured, you’re now set to build secure, scalable, and future-proof integrations in Integray.